How to Install PostgreSQL on Linux (Ubuntu 24.04 LTS, Noble Numbat)
On this article we will show you how to install PostgreSQL version 17 on Ubuntu 24.04 LTS operating system. There are two options to install PostgreSQL, namely :
1. Install PostgreSQL Using APT (Recommended)
2. Install the Latest PostgreSQL Version from PostgreSQL Repository
On this tutorial, we will use option number 2 (Install the Latest PostgreSQL Version from PostgreSQL Repository) to ensure if we install the latest version of PostgreSQL database engine. Currently, the latest version of PostgreSQL is version 17.4. The installation step will be consist of several steps, as exlpained below :
- Step 1: Add the PostgreSQL Repository
- Step 2: Update Packages and Install PostgreSQL
- Step 3: Verify Installation
- Step 4 : Log in to PostgreSQL database
- Step 5 : Manage PostgreSQL service
The details explanation of each step will be summarize on below sub chapters.
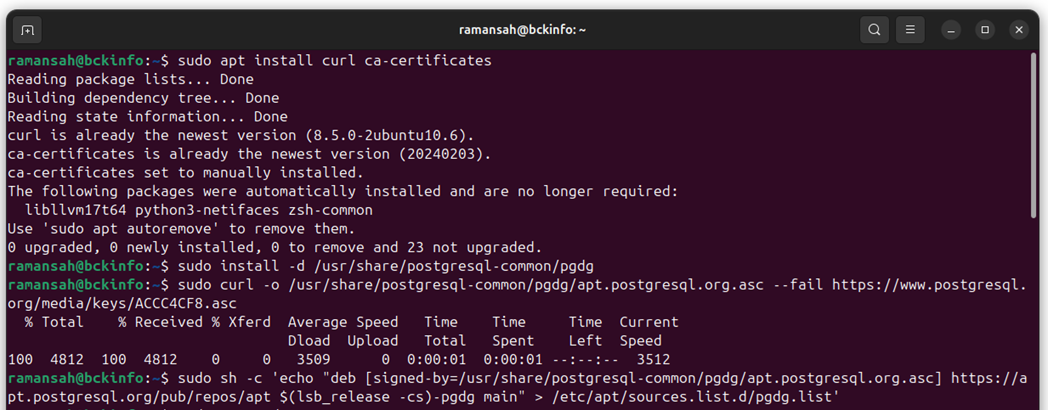
Step 1: Add the PostgreSQL Repository
To install PostgreSQL using PostgreSQL repository, we need to add its repository to our system. For this purpose run the following commands:
sudo apt install curl ca-certificates
sudo install -d /usr/share/postgresql-common/pgdg
sudo curl -o /usr/share/postgresql-common/pgdg/apt.postgresql.org.asc --fail https://www.postgresql.org/media/keys/ACCC4CF8.asc
ssudo sh -c 'echo "deb[signed-by=/usr/share/postgresql-common/pgdg/apt.postgresql.org.asc] https://apt.postgresql.org/pub.repos/apt $(lsb_release .cs).pgdg main" . /etc/apt/sources.list.d/pgdg.list'
Step 2: Update Packages and Install PostgreSQL
After adding PostgreSQL repository to the system, then we need to refresh our Ubuntu repository by submitting command line :
sudo apt update
Then we just install it by running the following command line :
sudo apt -y install postgresql
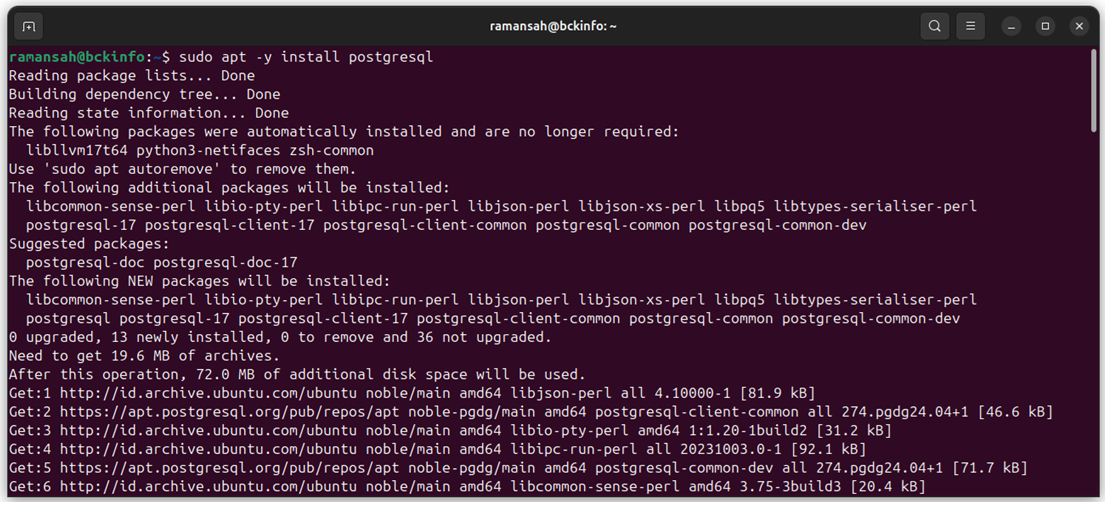
Follow the installation process until the end.
Step 3: Verify Installation
After PostgreSQL 17 installation was completed done, then we will verify it by running the command line :
psql --version

This command is also to verify the PostgreSQL version.
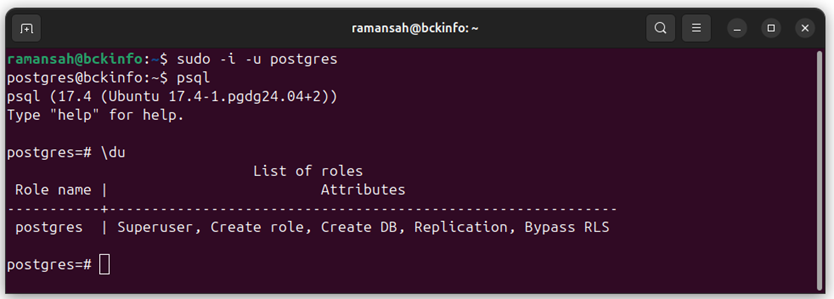
Step 4 : Log in to PostrgreSQL database
At this stage, we have just the PostgreSQL 17.4 installed on our system. Then we will try to log in to this database server engine. By default, PostgreSQL creates a system user named postgres. Switch to this user to access the PostgreSQL shell:
sudo -i -u postgres
then hit the comman psql to enter to PostgreSQL shell, as shown below :
Step 5 : Manage PostgreSQL service
To manage PostgreSQL database engine service we will have the following command lines :
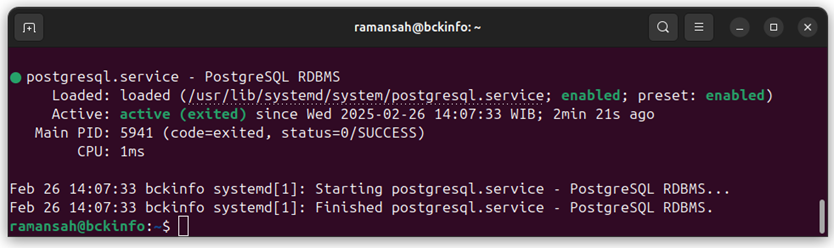
sudo systemctl start postgresql   -- start PostgreSQL service
sudo systemctl enable postgresql  -- enable when the system boot
sudo systemctl stop postgresql   -- stoping PostgreSQL service
sudo systemctl status postgresql  -- show the status of PostgreSQL
sudo systemctl restart postgresql   -- restart PostgreSQL service
Here is the status of our PostgreSQL 17.4 :
Conclusion
This guide helps you install the latest verson of PostgreSQL on Ubuntu, using the PostgreSQL repo. Let me know if you need more details!
Related posts:
 How To Set Up PostgreSQL 17 on Docker CE
 PostgreSQL Database Sample ‘carrentaldb’